Sewing With Black FabricAugust 8, 2025 Sewing with black fabric has it own rules and guidelines. Primarily the shining or smoothing of the fabric, but at the same time you want to get a great press, especially on cotton
or linen. But you can get a shine on silk and wool (particularly crepe) and even on a satin, there will be a shine. There are many
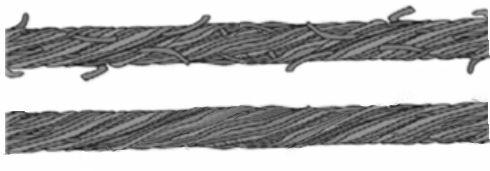
reasons why a fabric may shine, but what happens to the fabric is similar even if it may be caused by several things. What happens is that most natural fibers (except silk - we'll talk about that later), are woven from strands of linen, cotton or wool that are from anywhere to 1" in length to at most 3" in length. So that means that when this yarn is twisted, some ends of the strands of fiber stick out.
As you can see in the top version there are more strands sticking out, which means it's made of shorter fibers, whereas in the bottom version the strands are longer. The bottom version would be how long-staple cotton looks while the top is the more common
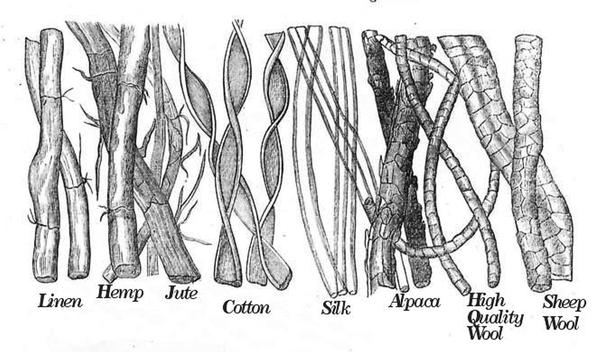
shorter staple. This happens in wool and linen too, although linen strands are longer and smoother, the properties of linen make it less smooth. In this nice photo you can see the plant shoots sticking out of the linen, the scales of the wool and alpaca fibers, and in this case the cotton (it's been mercerized) and silk appear smoother. But when the cotton is woven as a staple - not long staple - it will be a duller or brushed finish
You can also see in this pic above, why silk is so shiny. It's the only natural fiber that is one strand from beginning to end. It's the strand of the cocoon of the silkworm, and makes for a very lustrous finish.
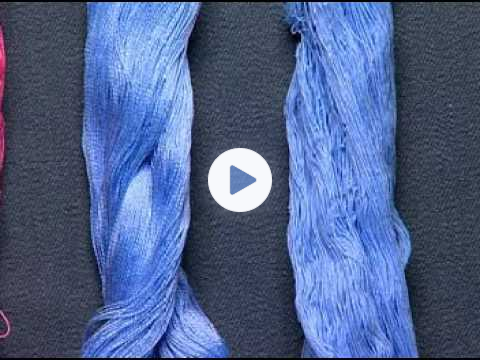
Here's how
mercerized cotton is made and the difference it makes in cotton.
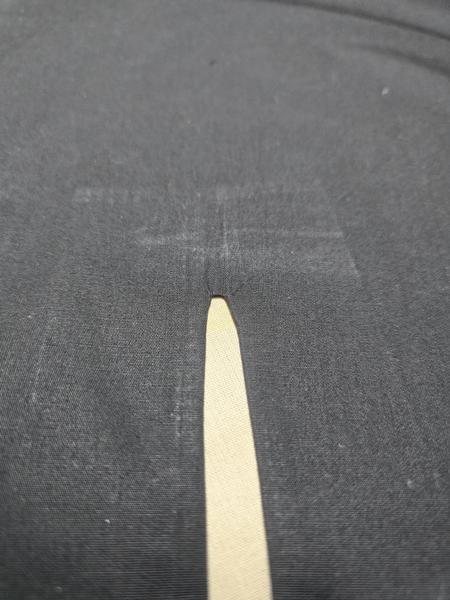
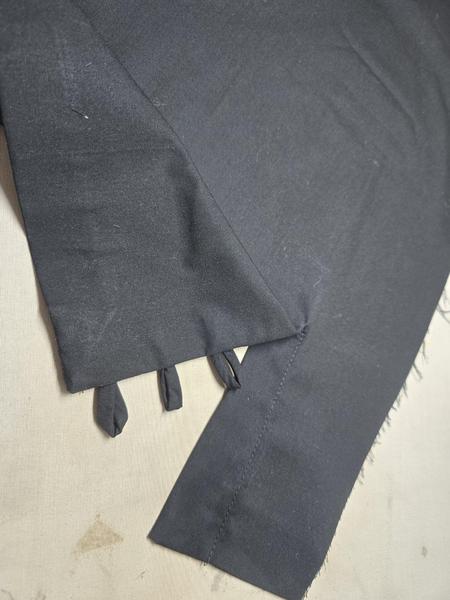
But back to our black cotton. So when the metal sole plate of the iron goes over black fabric, you get a shine like this.
I've faced the slit in this piece, and you can see where the seam is, the edge of the seam and can even see the serge on the edge of the facing. Pretty much when you do this, you've ruined the fabric. This most often occurs in darker-colored fabric,
although I've seen it in older garments where the cleaners has put a mangle press on pants and caused a shine in the seam. This is what a mangle looks like
These are mostly used today in cleaners, and they make fast work of ironing, which is why they are used. But they do make khaki pants and anything darker shine at the seam. I've even see that shine on my heirloom wedding gowns that have been
"preserved" by professional cleaners. So it can occur in any colored fabric, but you will see it less on white or off-white garments.
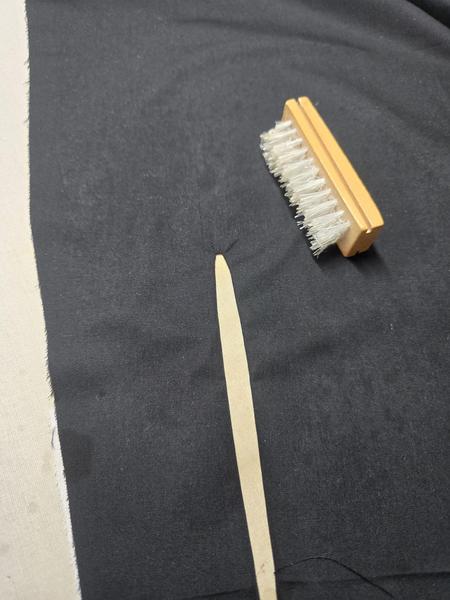
So what do you do if this happens to you? Taking into consideration how the fiber looks, what we need to do is lift those ironed-down fly-away ends so that it has a more brushed or dull look. On cottons, linens, and wools, this is what I do most often. I dampen them with a little spray of water, and brush them with a suede
brush. (Click the pic for more info).
This helps to pop up those fly-away endings real fast.
You can see the little splotches of water at the bottom, but at the top the shine is all gone. I also used a press cloth, which is an infallible way of preventing shine. I simply brush the fabric then press it again, either on the wrong side, or with
a press cloth or a Teflon Iron shoe.
This is the iron I'm using now with huge success. You can see on the bottom is a soleplate cover, which is Teflon. This is an excellent way to make sure you have no shine. But if you don't have a soleplate cover for your iron, you can use a press cloth (usually a scrap of muslin or an old sheet) and that will work fine as well. Also pressing on the wrong side works well. I keep a
big thick towel under my ironing board cover and this ensures that I don't get a shine.
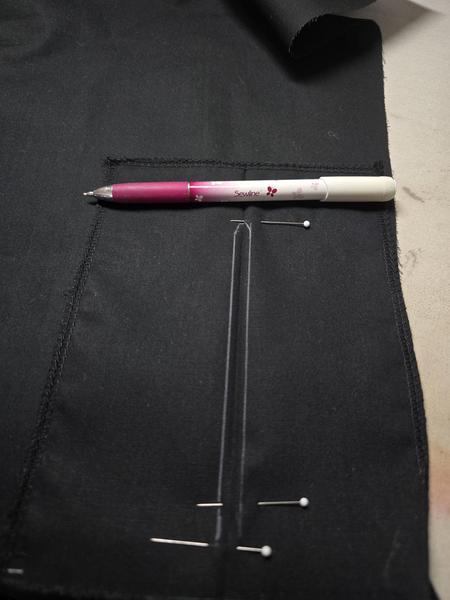
Another problem I have with black fabric is marking and seeing the marks. But I've solved that with these wonderful Sewline pencils that are in
white, yellow, pink, light blue and a grey charcoal. They have a fine tip as they are a mechanical pencil, and they brush right off when you're finished. But the white marking here makes it easy to see where I sewed.
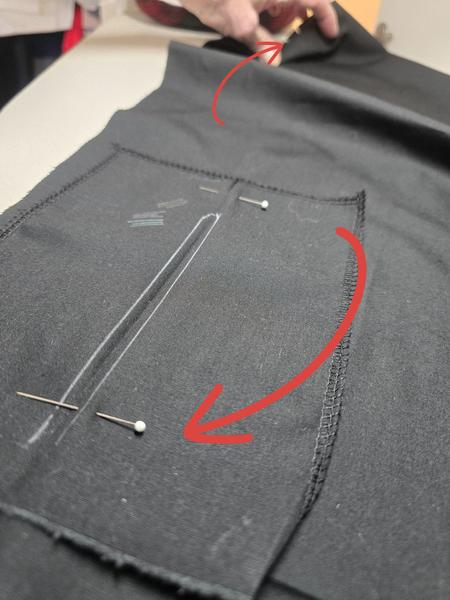
I interfaced this cuff cause I knew I would be wrestling around with it to get the opening just the way I wanted on the sleeve. I zipped right through the first sleeve, and it was the second one that I almost really messed up.
If you'll notice, I'm checking to make sure that I do the "back" of the sleeve and not the front. Having the opening in back instead of in the under seam, means that it hangs a lot prettier, and it's not as clunky if you're working on or close to a table.
You can also see the three colors of the chalk mechanical pencils I have marked on the black fabric with the white being the sewing line.
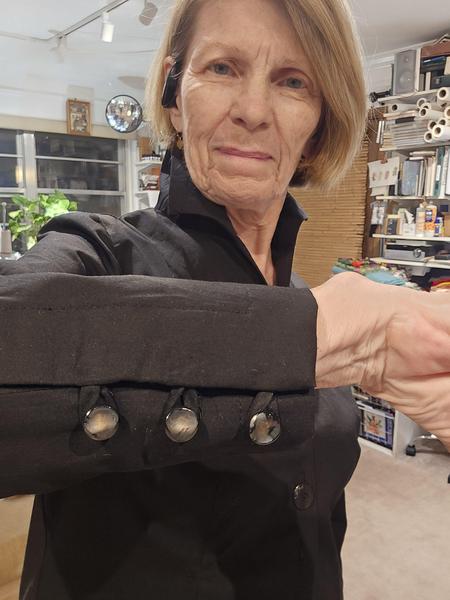
This may look a little bumpy (which is another thing about dark fabrics - they show ever bump in them because of the light that reflects off the fabric), but it's smooth here, and the buttons with loops are a nice detail.
It would have taken me about 2½ hours to make this if it weren't for this detail I
added, but I do like it, and it tones well with the pants. I can also unbutton this, and push the sleeves up and it makes a very nice slit in the sleeve cuff when it's open.
This is the variation on the sleeve-slit placket - very easy to do and very lovely when you finish. Here's the original
tutorial on the classic dressy sleeve placket (or vent), and for this blouse, I used this technique only make the placket about 1" thick instead of the ¼" thickness that I used in the tutorial. Both work the same and make for a lovely blouse placket or vent. And instead of sewing this straight up on the front (top) side, I inserted the bias loops to make nice loops for the buttons.
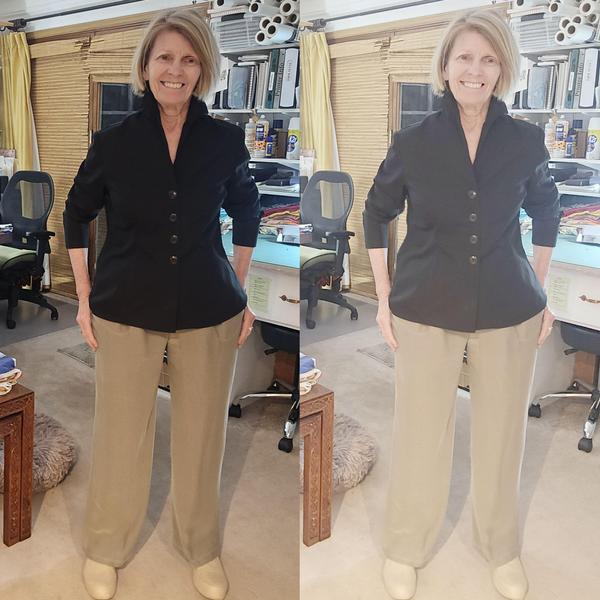
Additionally, it almost looks like you're working in the middle of the night with no light. If you don't have a good "daylight" LED light on your machine, you can purchase a simple easy strip that sticks to the underside of the machine to provide you extra light that you will be so thankful for when you sew. Along with the light problem is photographing or seeing this in the mirror. Black absorbs light and reflects no light. That means that it's very hard to see any errors or even the hang of a black garment without full light, or in the case of my photo here, artificially lightening the photo so you
can see any faults or problems. You would think that you can feel them, and you can some, but some are visible only (especially if something's too large).
The bottom line here is that I love this pant. It's so comfortable and reminds me of the pants I used to wear 40-50 years ago when elegant pants had room to move and do basic things like get in and out of a car. And I probably could have made that top a little lower, and there's always that possibility.
Even though I've lightened this photo and enhanced the contrast, it's
hard to see the beautiful roll of this collar. It frames my face and makes for a very flattering neckline. Without a scarf or some other contrast, that's totally missed. So possibly what I may end up going with is a patterned black and bone or black and tan pattern in this blouse. Talk about pattern
Talk about other fabric prints
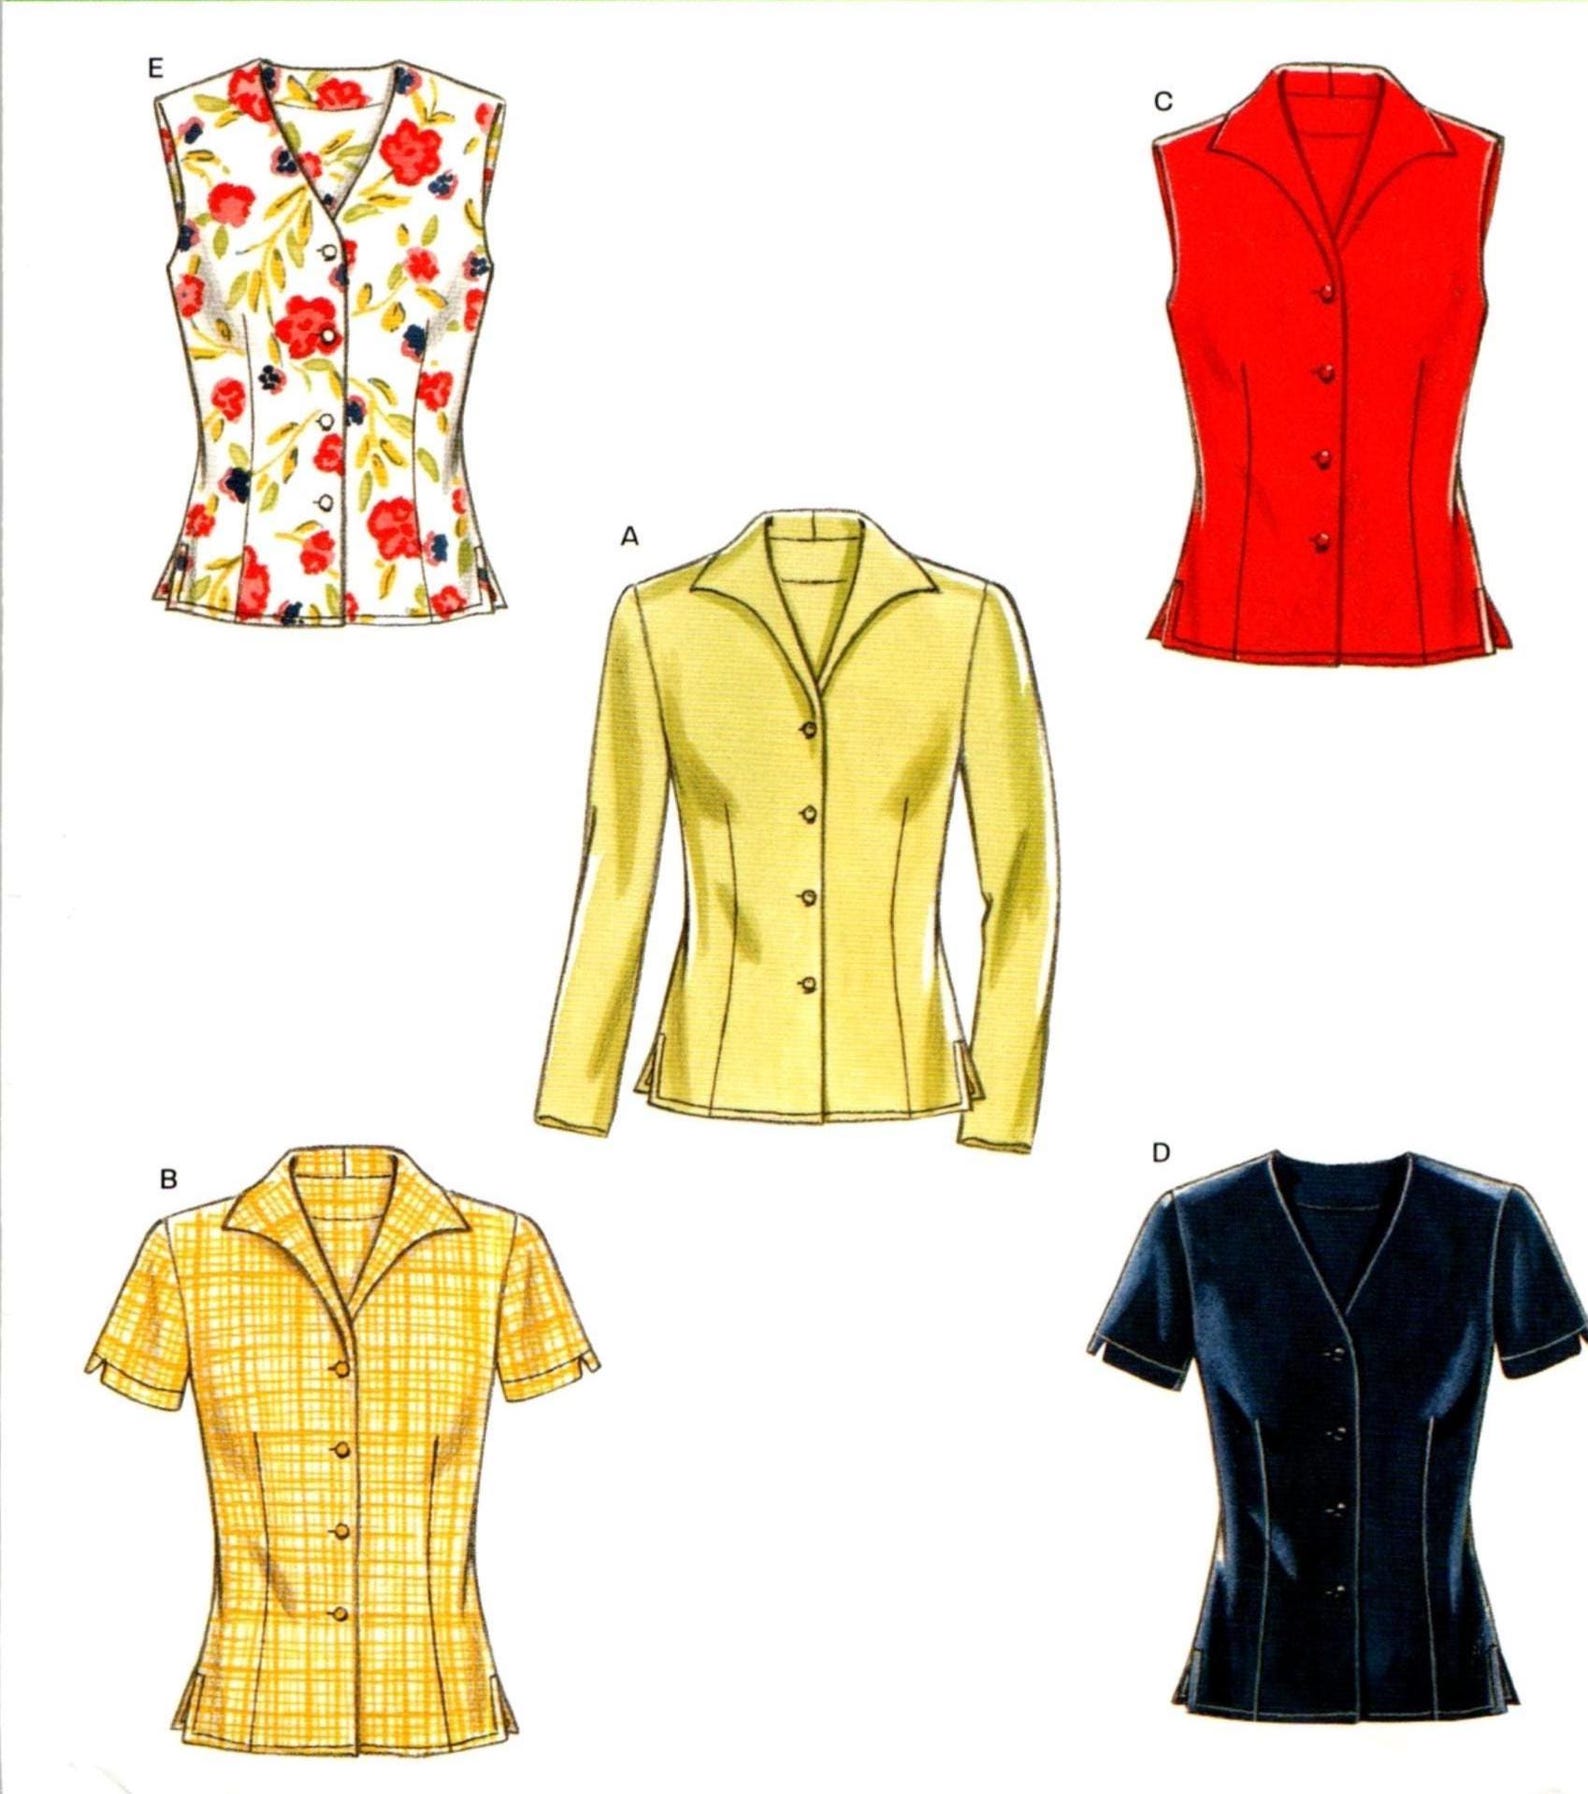
I used one of my standard patterns - New Look 6598, only I've already lengthened the pattern to fally below my hip, and possibly to have a vent on the side.
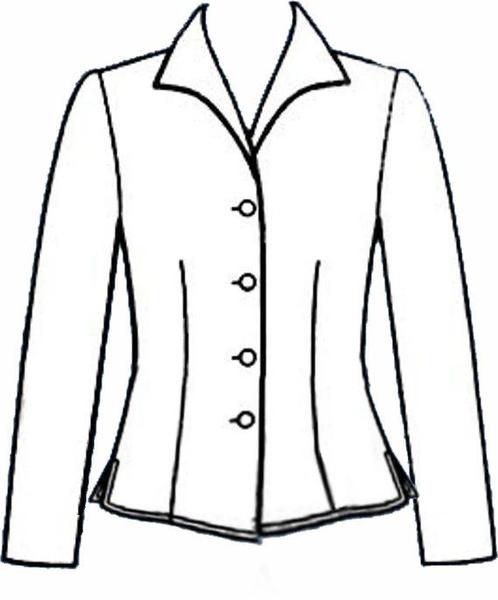
This is a charming little blouse that's easy to go together because it doesn't have a collar band on it. The roll on the collar is still fabulous cause it frames the face so beautifully.
I plan to make one (OK one for now, probably later there will be many more), alteration with the hem slightly higher on the sides and still with the slit, and longer than this length here. This will give it more of a "top" look and is more flattering on my
figure.
For a real quick summary (I didn't expound on all of these) here is a quick
run-through of my version of advantages and disadvantages of sewing with dark fabric.
- Versatility: Black fabric is timeless and versatile, suitable for a wide range of garments, from formal wear to casual clothing. It pairs well with most colors and patterns.
- Hides Stains and Flaws: Black fabric is forgiving when it comes to hiding minor stains, dirt, or imperfections, making it ideal for everyday wear or items
that see heavy use.
A grease stain doesn't show up at all, unless you shine a spotlight on it. - Slimming Effect: Black is often chosen for its visually slimming effect, making it a popular choice for fashion items like dresses, pants, or jackets.
Professional and Elegant: Black conveys sophistication and professionalism, making it a go-to for business attire or formalwear.
Should go without
saying! - Less Visible Wear: Fading and wear are less noticeable on black fabric compared to lighter colors, extending the visual lifespan of the garment.
- Shows Lint and Dust: Black fabric tends to attract and prominently display lint, pet hair, and dust, requiring frequent cleaning or lint rolling.
- Difficult to See Stitches: When sewing, it can be challenging to see black thread against black fabric, making precision work like topstitching or seam adjustments harder, especially
in low light.
Remember LIGHT, LIGHT, LIGHT - it's your friend and it really does help. - Absorbs Heat: Black fabric absorbs more heat from sunlight, which can make garments uncomfortable in hot weather.
So if you want to do something that is more comfy, you might think of a lighter-weight fabric, if it's going to be in black. You can always wear a camisole or tank under it, particularly if you want a lot of attention, make
that camisole/tank in your skin color so it looks like you're wearing nothing! - Fading Over Time: While less noticeable than on bright colors, black fabric can fade to a grayish or brownish hue with repeated washing or sun exposure, especially with lower-quality dyes.
This will be a real problem with a black silk, which will over time fade. Cottons, particularly mercerized cottons won't fade that much. Part of this will be
due to how many times you launder the garment. Laundering your garment is the hardest, most damaging thing you can do to your garment. It's best to let it hang out in the air overnight to air it out and let the wrinkles fall out naturally. If it's got a spot or two, spot it with some water and a little gentle soap (Zote Bar or Fels Naptha) and rinse and blot then let it air dry and press if needed - usually it's needed. The gentler you are with your laundering the
longer the garment will last. - Chalk and Marking Issues: Marking patterns or alterations on black fabric can be tricky, as chalk or temporary markers may not show up clearly, requiring special tools like white or fluorescent marking pens.
Normally this is true, but I can't say enough good words about the Sewline mechanical marking tool. They act and are exact like a traditional mechanical pencil, but they don't need any sort
of "activating" to make them work. IOW, They can lay around in the dry air for years, and pop it out and it will mark just like it was a new pencil. - Quality Variations: Not all black fabrics are created equal—cheaper ones may have inconsistent dye penetration or be prone to pilling, which can affect the final look.
Your time is very valuable. It's the most precious resource you have and your fabric should match that same value. I had an art teacher once
talking about the difference between "student" quality paints and "professional" quality paints. My colors and texture and what the paint would do were always more consistent, brilliant and better than the lesser quality. These Tessa Pants wouldn't be nearly as beautiful in a lesser quality fabric. Fabric quality really does make a difference.
The bottom line is that there is nothing more elegant, timeless and classic than
black in summer and white in winter. Consider making a black top for summer and see how it adds just a little something different to your look, but still classic and professional.
The SewingArtistry Resource Library is designed to contain information to not only make your sewing better, but to aid in you fitting and flattering your shape, size and style. Check it out.
Look for future classes coming in 2024
The Core Pattern Shirt, (one of my favorites for woven core pattern that you can make into a myriad of different
garments),
Basic Knit Top (core pattern class for knit basic tops, shells, tees, dresses, and tunics)
|
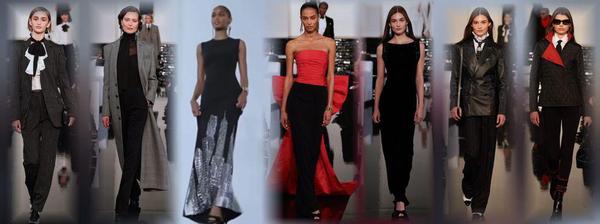
Tracking a fashion trend isn't all that hard after seeing a few of them.
Living from Mid-Century Modern through Twiggy...
It's worth the time to look at these styles, particularly today as
there is a group of that wants to look....
This is the way fashion used to be -- pretty, flattering and I can't wait to make some of...
NOTE: There are some folks who can't get my email, or it's sporadic, or something is hinky. I will always respond to any of you who send a private message, whether it's about the topic of the week or something else. If you don't get anything
from me, it's probably because the [email protected] email is blocked, and even a private message can't get through. In that case, I'm on Instagram often, and you can always PM me at @sewingartistry.
As a precaution,
please ensure I'm in your email Address Book and check your spam, junk, and trash folders. Some email clients get extra excited when they see emails coming into the Inbox that go to many other receivers. They automatically think it's trash or spam, and it never makes it to the Inbox. I must constantly check my spam and junk folders to ensure I'm getting the emails I subscribe to.
To view in browser along with past emails, click here. We respect your email privacy. |
|
|